Kamis, 29 Desember 2011

Download Windows 7 KEYGEN 1.9 : Aktivator Untuk Semua Jenis Windows 7


Windows 7 KEYGEN 1.9 | 1.3 MB
Nih aku kasih softtware bagus, banyak software sejenis ini yang udah aku share.. lumayan buat tambah tambah... hehehe... !

HOW DO I APPLY A SERIAL FROM THIS KEYGEN TO WINDOWS 7 ?

1.Open Keygen
2.Click Generate
3.Click the little info button (should also copy the serial to clipboard)
4.Start>Right Click>Properties>
5.windows activation>Enter key,Ctrl V/Right click>Paste

Password : dwicky

Semoga bermanfaat! salam Dedyxxx12 Jangan Lupa Follow blog ini yaaaa..!!
Read More..

memperbaiki dll yang hilang atau rusak dengan DLLFiles Fixer

DLL Fixer v2.0 FULL PATCH


Berikut adalah salah satu situasi yang dikarenakan file dll kita missing :


Selain bisa memperbaiki dll yang hilang atau rusak DLLFiles Fixer ini juga bisa memperbaiki registry yang error jadi komputer sobat bisa lebih cepat lagi setelah diperbaiki oleh DLLFiles Fixer.

Cara Patch:

-Install Software, setelah diinstal langsung di close secepatnya program tersebut.
-Copy dan paste file patch ke folder tempat sobat FHZone menginstall software.
-Untuk para pengguna vista dan windows 7 disarankan untuk klik kanan file patch "run as administrator", kalau pengguna windows xp langsung klik saja.
-Klik patch, lalu cari DLLFiles.exe dan tunggu hingga muncul pesan patch sukses dan done.
-Selesai.

OS: Windows 7 , Vista ,2000 , XP

Download And Enjoy:

Download DLL Fixer v2.0+Patch
Password: dwicky


Semoga bermanfaat! salam Dedyxxx12 Jangan Lupa Follow blog ini yaaaa..!!
Read More..

Selasa, 20 Desember 2011

DOWNLOAD Suikoden II (2) GAME ISO PSX/PS1 GRATIS Link Indowebster

Link Indowebster
Download HERE

or Link Media Fire


EMULATOR PSX WITH TUTORIAL KLIK 
----- HERE-----
Read More..

DOWNLOAD EMULATOR GAME PSX/PS1 ePSXe v1.7.0 + BIOS + Plugins WITH TUTORIALS GRATIS LINK MEDIAFIRE


ePSXe v.1.7.0 yang telah diintegrasikan dengan BIOS dan Plugins ini. Khusus bagi mereka yang bingung menentukan harus dimasukin kemana BIOS dan Pluginsnya atau bagi mereka yang malas mendownload satu-satu dan memasukannya sendiri.kebetulan juga ada yang riques jg nh ,,mudahan bisa membantu,,,

Minimum Required:
P200 MMX
256 MB RAM
Good 3D card

Recommended:
PII 500 --> Pentium III 600Mhz-1Ghz lebih disarankan
512 MB RAM
DirectX/OpenGL compatible card


Link Indowesbter: Download Here or Here
or 
Link Mediafire : Download Here
Pass: Night Walker@www.kaskus.us

TuTorial Playing Game Ps1/PSX On PC
(Panduan Setting game emulator ePSXe v1.7.0 di PC)

1. First thing first you need to extract the plugins to plugins folder


2. Extract the BIOS to BIOS folder


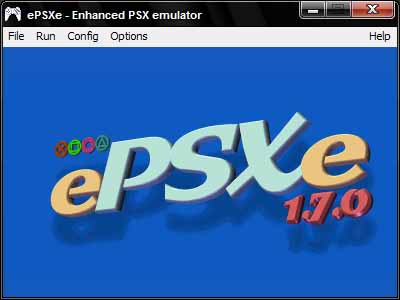
3. Run ePSXe.exe and you will find open window like this:


4. Now, you need to set up for Video, sound, cdrom ,BIOS, and Memory Cards. Select config and you'll find dropdown menu like this:


5. Video. Select config-->Video
a. Choose plugin you want to use (i Hope u used 
Pete’s DX6 D3D Driver 1.76:


b. Configure it. For complete tutorial, you can see the picture below for some example:


6. Sound. Select Config-->Sound
a. Choose plugin you want to use:
(i Hope u used P.E.op.S. DSound Audio Driver 1.9)


b. Configure it:


7. CDRom. Select Config-->Cdrom
a. Choose plugin you want to use:
( i Hope u used ePSXe CDR WNT/W2K core 1.70)

b. Configure it:

Please note, you must be right at configuring the drive letter. For example, your DVD ROM is (F: ) and your virtual drive is (G: ). If you choose to use virtual drive, then you need to choose (G: ) and vice versa.


8. BIOS. Select Config-->BIOS
Press select and then locate where the BIOS folder and choose one of the BIOS you wat to use
( i Hope u used scph1001-USA


9. Memory Cards. Select Config-->Memory Cards
Press select then locate where you want to store the virtual memory cards file.


It usually store at memcards folder at ePSXe directory folder, like this:

choose epsxe000.mcr for Memory Cards 1 and epsxe001.mcr for Memory Cards 2.

10. Gamepad.
If you have gamepad for PC, you can use it to play instead using keyboard. Just go to Config-->Gamepad-->Port1-->Pad 1

Configure it! First you need to click the button showned at the display then you must press the coressponding button at your game pad. Below the example, if you use gamepad with vibration feature:


And below are example if you use keyboard rather than game pad:


11. Play the game!
a. First insert the game CdRom or mount it at your virtual drive (ISO).
b. Choose File-->Run CDROM


12. Save State function.
You can use Save State rather than save at virtual memory cards. The benefit is, This Is Actually Save Anywhere Function, so you can save it anywhere an load right at the place you save. Pretty usefull function, huh?
**Klik Open link in new tab on picture for large size** 

note:
F1: Save State
F2: Choose slot to save (Different game will automatically generate different slot to save, so it wont overwrite your save)
F3: Load State 

Cara Memainkan Game ISo PSX dan CD PSX Di emulator ePSXe v1.7.0
(HOW TO PLAY ISO PSX ON EMULATOR)
Step :
-- Open file ePSXe.exe --
-- klik file runCDROM (cd PS1 OR PSX) atau run ISO (.ISO, .BIN, .CUE,) --
-- Loading and Play --
-- Bila ingin keluar dari game Klik Esc (CLOSE GAME) --
Read More..

Jumat, 02 Desember 2011

BagaiMana Cara membedakan slot VGA | AGP dan PCI express


Cara membedakan VGA AGP dan PCI Express ( PCIex ) merupakan VGA eksternal yang berbeda, dari segi kualitas maupun fisik keduanya berbeda. AGP memiliki 2 macam type yaitu AGP 4x dan 8x, Versi terakhir dari AGP adalah AGP 3.0 yang umumnya disebut sebagai AGP 8x yang dirilis pada November 2000. Spesifikasi ini mendefinisikan kecepatan hingga 533 MHz sehingga mengizinkan throughput teoritis hingga 2133 Megabyte/detik (dua kali lebih tinggi dibandingkan dengan AGP 4x). Meskipun demikian, pada kenyataannya kinerja yang ditunjukkan oleh AGP 8x tidak benar-benar dua kali lebih tinggi dibandingkan AGP 4x, sedangkan PCI Express juga mempunyai 2 type yaitu PCIex 1.0 dan PCIex 2.0. Kemampuan yang dimiliki PCI express adalah 2 kali lipat dari kemampuan AGP 8x, maka Disebut dengan PCIex 16x - 1.0 atau PCIex 16x - 2.0.

Tapi kini keberadaan VGA AGP sudah mulai jarang karena produksinya sudah dihentikan,
Banyak toko yang menjual AGP lebih mahal dari PCIex. Bilamana anda ingin membeli sebuah VGA untuk keperluan anda sebaiknya harus mengetahui perbedaan keduanya secara fisik. Bila tidak maka kemungkinan anda akan salah dalam memilih jenis VGA, apakah yang anda gunakanVGA AGP atau PCI Express ( PCIex ). Anda harus membeli sesuai dengan dukungan dari motherboard anda, bila anda mempunyai buku manual motherboardNya sebaiknya anda membaca dan lihat apakah motherboard anda mendukung Slot VGA AGP atau PCI Express atau PCIex.

Bila tidak anda harus secara langsung membongkar PC anda dan lihat slotnya.Biasanya juga tertulis di papan motherboard jenis apa yang digunakan :

  • Bentuknya lebar dan pendek,
  • Pembatasnya berada ditengah
  • Warna slot tergantung dengan merek motherboar bisa coklat, merah ataupun yang lainnya.
Sedangkan Ciri-ciri VGA PCI Express ( PCIex ) yaitu :
  • Bentuknya lebih panjang sekitar 8-10cm
  • Pemisahnya hanya 1-2cm dari sebelah kiri.
  • Warnanya juga relatif.
untuk lebih jelasnya silahkan lihat gambar berikut:


VGA | AGP | PCI | PCI express | PCIex

Gambar diatas menunjukan bentuk slot VGA pada sebuah motherboard,  tidak semua motherboard memiliki slot AGP beserta PCI Express. biasanya Hanya AGP saja atau PCI express saja, semua tergantung spec motherboard kita.

Sampai disini mungkin anda sudah bisa memastikan motherboard anda mendukung Slot apa, sekarang anda hanya tinggal mencari tahu bagaimana memilih VGA sesuai dengan keperluan anda, Kemungkinan Anda akan bingung lagi dalam memilih VGA saat hendak membeli, apakah harus membeli dari kubu merah ( ATI ) ataupun Kubu Hijau ( NVIDIA ).
Read More..